Starting seeds is super rewarding, but things don’t always go as planned. Here are 4 common seed starting problems- and how to fix them! So you can grow more for your garden from seed, with less problems!
Seedlings are a little like kids, don’t you think? They curl out of their tiny womb and depend on your for all of their needs. Then all of a sudden they are these tall, gangly things trying to stretch their roots, fighting you on every turn.
This site contains affiliate links. If you make a purchase using one of these links, I may earn a commission. Please see my disclosure page for more information about cookies collected and our privacy policy.
There may not be a parenting road map to help you with tall, gangly teenagers, but I can help you with your tall, leggy seedlings- and a few of the other common indoor seed starting problems you might come across while tending your seeds from sprout to outside.
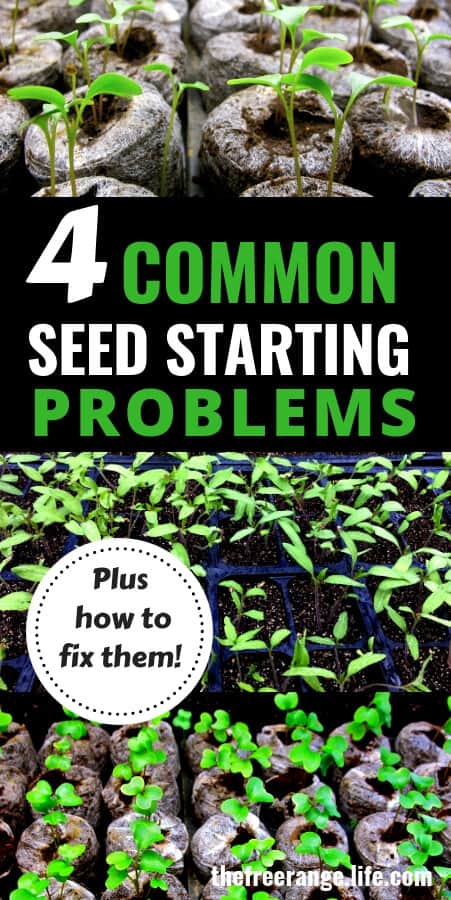
The Most Common Seed Starting Problems
Get the best start to your garden this year with my Yearly Garden Planner! With a growing guide, charts, and planning pages you will be set for success this year!
My seeds never germinate!
Germination problems can be caused by a variety of reasons. Some of the most common are:
Incorrect Temperature.
Different seeds have different needs. Cool weather crops such as cabbage, kale or broccoli have a much lower germination temperature while warm weather crops like tomatoes will germinate better with temperatures in the 70F range.
If you are sprouting your seeds in a cool basement or outbuilding you may need to provide supplemental heat- such as a heating mat– to ensure germination.
Old Seeds.
When properly stored seeds can have a very long shelf life. But the older they get, your germination rate will begin to reduce.
For the longest life, store your seeds in a cold, dry place. Humidity and warmth will greatly reduce your seeds’ shelf life.
Incorrect Watering.
Water in a necessity for all plants. In the germination stage you need to make sure you keep the soil evenly moist.If you water too much, you run the risk of your seeds rotting before they germinate.
If you let them dry out, they will either never germinate or die trying!
I use a handheld pump sprayer to water my seeds- a few times a day sometimes.
Planting Depth/Light.
When you plant your seeds pay attention to your planting depth. This is important because if planted too deep you plants could run out of energy before reaching sunlight. Planting too shallow can lead to drying out.
Some seeds actually need some light to germinate, so instead of digging them down you just press them into your soil. Read your seed packets for information on each seed so you know exactly what each seed type requires.
My seeds sprout and then die!
Everything starts off good. Your seeds germinate and you have little seedlings growing strong. Then all of a sudden they whither up and die! This is often called “dampening off”.
It can be prevented by using these seed starting practices:
Do not over water.
Too much moisture allows disease to grow and plants to mold. Once your seeds have germinated, water your seedlings only when the soil is beginning to dry out.
Watering from the bottom is best, but do not allow them to sit in standing water once they are done taking it in.
Do not overcrowd.
Your plants need room to breathe. A room with good airflow, as well as enough space between the plants will help them stay healthy.
Start with clean soil.
Oftentimes disease in seedlings is caused by disease that is laying dormant in your soil or in your seed starting pots. Wash your seed pots and trays each year before planting.
Consider buying a sterile soil if you have a major problem, that is not cured by the already mentioned steps.
You can also pasteurize your soil prior to use.
It all started off good, but my seedlings just aren’t getting very big!
They sprouted, they are alive, but they just aren’t growing!! Just like with germination, different seeds have different needs.
But here are some of the common reasons for stunted growth in your seedlings:
Incorrect temperature.
If it is very cold your seedlings will not grow at the same rate they would in warm weather. Warm weather crops like peppers, tomatoes, or eggplant require temperatures around 75F to be happy.
Even if they are small chances are when it warms up and they are outdoors they will take off and make up for their slow start.
Nutrient deficiencies.
If you seed starting medium is lacking in nutrients they will not grow properly. Keep an eye out for the symptoms of some common soil nutrient deficiencies and feed your plants a little bit as they grow.
Overwatering.
Over watering is the number one cause of stunted growth. If your seedlings are stunted and have yellow tips, this is most likely the cause.
Waterlogged soil prevents the plant’s roots from bringing in oxygen, which will damage the roots and the seedling will be at risk for many more problems. Let the soil dry out just a bit before watering- and the soil should be moist not soaked.
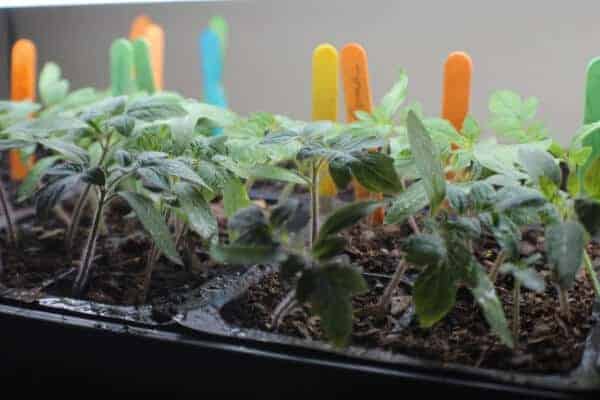
My seedlings are tall, thin, and leggy!
Legginess is a common problem in plants that are started indoors and it is caused by the seedlings having to compete and stretch for their light source.
Here are a couple of ways to reduce the tall, leggy appearance of your seedlings:
Rotate your trays.
If you are using a south facing window, make sure to rotate your plants a couple of times a day so that all plants have an equal time closest to the window.
Even if you are using an artificial grow light, rotating the plants within your trays is still a good idea so that all get equal time directly under the light.
Take advantage of warm, sunny days.
If you have a warm day, set your seedlings outside in a protected area for a few hours. They will benefit from the direct sunlight, as well as get a head start on the hardening off process.
Use a grow light in addition to your sunny window to ensure the optimum daylight length of 15-18 hours.
Thin out your seedlings.
The more crowded they are, the more they will have to compete for light.
Get more tips on starting seeds: 5 Tips to Starting Seeds Indoors Successfully or if you are having trouble with sowing seeds outside, here’s my troubleshooting guide for Outdoor Seed Sowing Problems.
If you are new to garden be sure to check out my Tips for New Gardeners and my guide to Common Mistakes Made By Beginning Gardeners.
If you start your seeds at home what do you have the most trouble with when it comes to seed starting? If you have ones other than the ones I have listed, let me know in the comments!
Enjoyed reading your info re: plants /growing info
mr g ihave planted loads of seedlings in pots and tray marked with marker what they are after a few weeks my lables have washed away is there any way I can tell what seedlings are what please
Pencil. Will last much longer. This saved me a few years back. So simple.
I used 4oz plastic cups, poked holes in the bottom and marked each cup with a black sharpie. Works great!!
Write name and date on popsicle stick with a sharpie. Then “paint” over the name with clear fingernail polish.
I label my trays on the outside with a number with sharpie and then draw a diagram on paper that is kept separate of my plants. You should be able to tell what each plant is (more or less) by the time they are ready to transplant. Look up pictures for each plant you know you planted or go to a garden store and look at their plants.
I use a plastic spoon- I write what it is on the front and the date on the back with a sharpie marker. No problems with it coming off.
I make a diagram of the seeding tray on a piece of paper and then label the paper. This way I can also make notes as to when I planted, when it should germinate, when to plant outside, etc.
it took 2 weeks for my pumpkin to sprought. why did it take so long
Pumpkin seeds are quite hard, and they prefer warmer soil to germinate. Soaking them in warm water for a few hours before planting can help speed things up, as will bottom heat. And then, some seeds just take much longer than others to germinate — I planted my datura five weeks ago, and I just saw the first wee sprout today!
I’m starting sun flowers inside, they grow up nicely then seem to die off? I use a grow light for my air plants and they are in the range as receiving the light. Is it common to have the shell still stuck to one of the leaves?
Thanks for any advice you want to share😉👍🌻
I know I’ve watered too much in the past, but I didn’t understand why it was SUCH a problem. Perhaps I can stay my hand now. Thanks!
We just planted our garden then it rained like 3 inches. Do you think our seeds could still be in place? We planted just as pack said with each one. Thanks
My peat pods with berry seedlings inside molded. What did I do wrong?
I just started my seeds last week, and finally have some cute little seedlings. I’m always so scared if they will make it or not! Last year I didn’t have such good luck, but I’m a little wiser this year. Thanks for the extra tips to make sure I get some nice, strong plants!
Thanks for these sage tips! We have some leggy radishes right now that could definitely use to be thinned…now, to find the time!
Do you fertilize? I am trying organic seeds, want to use fish emulsion, but don’t know when to start. Thanks
I don’t fertilize unless there seems to be a need for it. I do like to water with water from my fish tanks, which adds some nutrients. They don’t need much in the way of nutrients when they are germinating or as sprouts- I am sure it wouldn’t hurt once they have a couple of true leaves
Iformation about watermelon
My worst problem used to be ‘damping off’, but now I water from the bottom the first few times with (cool) chamomile tea.
What causes my soil to get moldy when starting my seeds indoors?
Too much water usually. That and humidity.
Try sprinkling some cinnamon on the soil around the seedlings. It safely keeps mold at bay! I just learned this trick and the problem is solved. It even worked for seedling trays that already had mold… it is now gone.
That’s an excellent tip. I hadn’t heard that before and I’m going to try it now.
I started a lot of impatients and wave petunia seeds this year. Also lemon grass and Hostas in newspaper pots with potting soil. I placed them in a seed starting pan with a lid. They were kept moist, under grow lights, and afternoon sun. Most of them germinated but never grew after they came through the soil. They lived that way for a couple months. I talked to the seed company and they sent more seeds. It is a very reputable seed business so I am sure that it is not the seeds. I replanted altho it was May by then. Same thing. I put these outdoors when they came through the soil. Its July and they are still there, same size, little 2 leaf starts nothing more. I am stumped by this and I have no idea what I have wrong. I have gardened a grown house plants for years without a problem…..ideas????
Margaret
Have you tried using a soilless mixture instead of “potting soil?” Potting soil is oftentimes to compacting for young root systems. Young roots need to be able to absorb oxygen and I think this may be your problem. Young seedlings can start just fine in potting soil sure, but its whats happening AFTER the roots start developing I believe to be your issue. Basically your roots are being suffocated because each time you water (if you top-water) the soil compacts more and more each time. I have a great soilless recipe if you are interested.
I would love some info on the soilless planting medium. I grow succulents, as well as start seedlings for my vegetable garden. I have Used Bonsai Jack mix, but it is really expensive for the number of plants I have. Would love to have your recipe
.
Did you use new potting soil? or re-use the old stuff? It sounds like you are in a cycle that repeats itself so….. something in your method needs to change, eh? Sending more seeds is the only thing a seed co. can do, and kudos to whomever it is, but they can’t solve your problem because when they grow their seeds, they have a proven method they use time after time. You have to find your own proven method…does this make sense to you.
When should you transplant seedlings? How long can they stay in their starter trays?
I am wondering the same thing.
I pot my seedlings on when they have two sets of leaves (usually the second set is true, ie like those of the plant you are growing). Although I plant my seeds in potting compost or moist coir ( peat free) I transplant them in to John Innis no 2 (this soil is fine in texture but has more nutrients in it). I usually find that this is when the seedlings perk up and reeally start growing.
With respect to timing most of my seeds germinate in less than 10 days and I usually transplant them 2 weeks later.
explain the common problems with sowing seeds directly in seedbeds?
The most common problem I have when I plant seed directly in the garden are birds, squirrels, or chipmunk digging up the seeds. The birds love cucumber seeds. I find those on top of the soil with the inner seed removed from the hull. The squirrels and chipmunk go after the pea seed and squash seed. Bird netting helps, but it tangles very easily. I have caught chipmunk in bird net also. And I have tried the metallic ribbon. It helps but nothing is very foolproof.
I started my seeds in an enclosed area using new soil, grow lights and heat pads under the trays. The seeds sprouted nicely and grew, however, at outdoor planting time the plants had very shallow roots. I expected the roots to fill the pots but they only went down about a half inch. This was common for all plants I started, geraniums, impatiens, zinnias, tomatoes, cabbage. Any ideas?
Mary,
What kind of media are you using when you start your seedlings? You didn’t mention it but if you are using typical potting soil that is probably the reason why. Potting soil will germinate and even grow a plant for a time, but the problems arise once the roots get “compacted” by the soil especially if you top-water them. You are lucky that they stayed alive as long as they did because oftentimes this will be detrimental to a new seedling. If this is indeed what you have done, I would suggest you move to a soiless potting media such as coir or spaghnum peat moss with some perlite/vermiculite. But remember if you use the peat moss to add some lime to counteract its acidity.
We started some geranium seeds and it said to use A bottom heat source which we did and it said to keep them in darkness. The bottom heat has created a lot of humidity and of the 50 seeds – 8 have sprouted in four days (way faster than predicted) I know they will get leggy and probably die if I don’t take the cover off but I don’t want to mess up the rest of the seeds either. What should I do?
Tracey are you from traverse city?
I germinated my seeds and all looked good. I planted them pretty shallow but when checked two days later expecting them to have popped up by then and I could not find a trace. Gone, completely gone. They were inside too.
That happened to me a few times … I see it as placebo seeds amongst the good – if seeds are coated & being counted by a machine, it doesn’t know there’s no seed inside the coating.
I found the best solution to prevent “legginess” in my seedlings which I start indoors is to keep the grow light vey close to the seedling tray, about an inch above the plants. I raise the light as the seedlings grow, always keeping the light close to the plants.
will the legginess plant produce or do I need to start over?
Some transplants can be planted deeper when you set them in the garden. This is true for tomatoes especially.
Another thing to do to strengthen the stems of seedlings is to either aim a fan at them on low speed or gently brush your hand across the tops of the plants several times a day. The air movement is similar to the wind plants feel blowing on them when they are outdoors. It stimulates them to produce strong stems.
Any suggestions on how to keep gnats out or how to get rid of them in the soil. I got new soil new starter pots the whole 9. Then bam those little things were all in the soil.
Allowing the soil to dry out in between waterings can help this problem as it kills the gnats. A lot of times the maggots can be in the soil itself when you buy it- I have a friend who sterilizes her soil before planting.
I started some seeds in my basement in the west window I spray them once every morning I will move them to my sun room on the south side but we still have frost I would have to bring them in at night in the spring I move them to containers last year they had to much shade so I am moving them to a more sunny area hope I’ll have better luck this year
I found if you transplant after the second set of leaves your fine I have gone till the third set of leaves come out and this way the roots are good and strong.
My seedlings are laying down. They are not standing. Please help. I need my tomatoes.
i have some seedlings i have started they are in there 1st week they where doing great giving them artificial light in doors and then moving them out in the sun i think i have gave them too much light and over watering so i have drained out my cubes as much as i can and now doing the 16hr off and 16hr on is there anything other i can do to make them thrive a bit moor and not die on me god forbid :(
why did it take 2 weeks for my pumpkin to sprought?
Nats or those tiny flies can be killed with hot water watering and Apple cider vinegar in a small container set close to your seed pots. Put a drop of dish washing soap in with the vinegar. Oh, only ACC with its mother attracts those tiny
flies.Hope this helps
how many days should it take for a seedling to dry out of water? i’m concerned that i have too much humidity. thing never seems to dry out!
my seeds are germinated quickly but later they have stopped growing.
what should i do ? i am not over watering them, giving sunlight, giving shed, giving cow manure…
I am at a loss. Years ago I planted tomato seeds and I did great! The last three have been horrible. I bought a heating pad for germination. Took it away once the seedlings start. Bought new grow lights. Placed them directly over the plants. They seem less leggy, but never develope the second set of leaves. What could I be doing wrong?
My tomatoe seedling seem to be doing just fine, I have brown on all my leaf tips. When can I safely transplant to my tomatoe planter?
I have had a small greenhouse now for about 3 years. Everything has been growing great. This year, something has been digging up my little seedling and bitting the tops off. Its not bugs, i think it must be mice but I haven’t seen any dropping’s. What else could this be? And what can I do?
My seedlings will pop up, all OK, altho a little leggy, so I’ve been taking them outside to get good sun. But then overnight, suddenly some of their leaves (none have reached true leaf stage yet) are gone and it’s just a stalk that falls over and dies. Different plants (cauliflower, broccoli, peppers and cilantro). Any clues as to why??? Thanks
I purchased the rosemary grow kit. I planted it on 4/11/19. I have kept it moist and by a window so it can receive the necessary sunlight. I followed the instructions but I’m worried I did it wrong. Is there a time period before germination?
Hi, thx this is really helpfull.. if my seeds failed to grow, should i change the soil with a new one or i can use it again?
My seedlings usually do pretty good. I have grow lights and heat mats. I’ve been growing them from seed for about 7 years now. On my recent batch I notice my tomato plants, still under lights, in 4 inch pots. are
Either curling up on the tomato monster type or leaves are purple underneath and bottom true leaves are dying off on my tomato gardeners choice. I use fish fertilizer to feed them every ten days. I have a small fan around them too. What is wrong and how can I correct them. I’m in CT so it’s still too to plant outside but they are getting huge.
Some of my flower seeds have set the second set of leaves and others of the same species have not…all started at the same time. All in the same trays with same light, heat,etc.
Should I fertilize now the ones with the second leaves?
well done i hope as i have read through will help me do do alot of planting indoors and outdoors.
Thank you
I am trying to sprout apple seeds in the fridge, some of them seem to sprout out little white blobs but no root or anything?
That sounds like mold.
The frig is likely too cold for sprouting seeds. We keep our seeds in the frig to store them between growing seasons when we don’t want them to sprout!
I’m not having problems with sprouting – my coneflowers are blooming and at the same time, the seeded parts have sprouted and many tiny plants have formed over the seeded part! What causes this? I’ve never seen it before – usually they dry up, the birds enjoy them, but sprouting heads?
Hello there, You’ve done a great job. I will definitely digg it and personally
suggest to my friends. I’m sure they’ll be benefited from this site.
I have maple seeds but having a hard time germinating them, what should I do,for is there steps that I need to follow?
Hello. I have begun to germinate a seed and its shell has opened only just revealing the white tip or the sprout. However, it doesn’t seem to have made more progress since then. When I compare to my other seeds I get worried it has ceased to live.
I have used the paper towel method and the seed has never been let to dry or over drowned. It has been 5 days. What is the max for germimation before I should give up?
Hi I have a papaya tree, when the fruit forms it doesn’t last for long. Sometime the fruit has a dark spot on it, and then it drops. What should I do
I have always had problems with seedlings. Right after transplanted they seem to go into shock for about 4 weeks. What can I do to solve the problem?
I dome mine with 2 lt. bottles that I cut the tops off of.
Since Feb 2nd my seeds germinate and only develop Cotyledons. Then for weeks they just stall and eventually die. I am using a sterile seed mix. I have grow LED grow lights, a heat mat (to germinate tomoatos peppers and egg plants). My LEDs are 6000K 5200LMN. I bottom water when the soil on top looks dry.
I’ve tried lettuce, beets, eggplant, bell peppers , jalepenos, larkspur and others. after a few weeks I even water with a little worm compost tea. but nothing seems to help. when I pulled the last dead peppers our of thier seed pot, there was a decent root system, but I never get any true leaves.
i have staggered my plants and some of them i have grown since mid march. they don’t seem to be growing in size. they don’t look too leggy but they are struggling to put out true leaves or get vertical. I have 2 T5 lights next to each other 3-4 inches above the plants. I am growing them in compostable cups and i water from the top which i feel like maybe a challenge but i dont want to scrap the whole thing. any ideas what i need to change?
Problem: I bought a healthy squash plant from a nursery. I got it home, planted it and that’s when the white powder mold started. I don’t know what happened. My soil is a good name brand and the pot is on my patio. I don’t see any holes in it from white moths, just the powdered mold. What went wrong??
Excellent post and wonderful blog, this sort of interesting posts I really like, keep it up…
Try peroxide sprayed on the soil, thats how my soil goes for my Purple heart plant it helps remove it.
The only seeds that have sprouted for me are on the edges of my seed tray. I am using a regulated heat pad set for about 80 degrees. I water mist the tray regularly.
I don’t like indoor sowing of seeds. My home is old cold drafty and it’s not worth the money time and waste. I don’t have a great deal of land but at least I have an area that is close to the house and has a good water source. Having breathing problems makes gardening challenging and I still have the desire to get out to the garden and make it grow.
My Top Tips for planting Leggy seedlings.
Pinch back the top. This encourages branching, making your plant bushier and stronger. Just snip off the top growth point above a set of leaves.
Adjust the environment. Leggy seedlings often stretch because they’re not getting enough light or air circulation. Move them to a brighter spot and consider using a small fan to gently blow on them for a few hours each day.
Thin them out. If your seedlings are competing for space, they’ll get spindly. Gently remove excess seedlings, leaving only the strongest specimens.
Start seeds earlier next time. With proper planning, you can avoid leggy seedlings altogether by starting them indoors earlier in the season.